


Create Pomodoro Clock in JavaScript Tutorial | freeCodeCamp
September 09, 2019
12 min
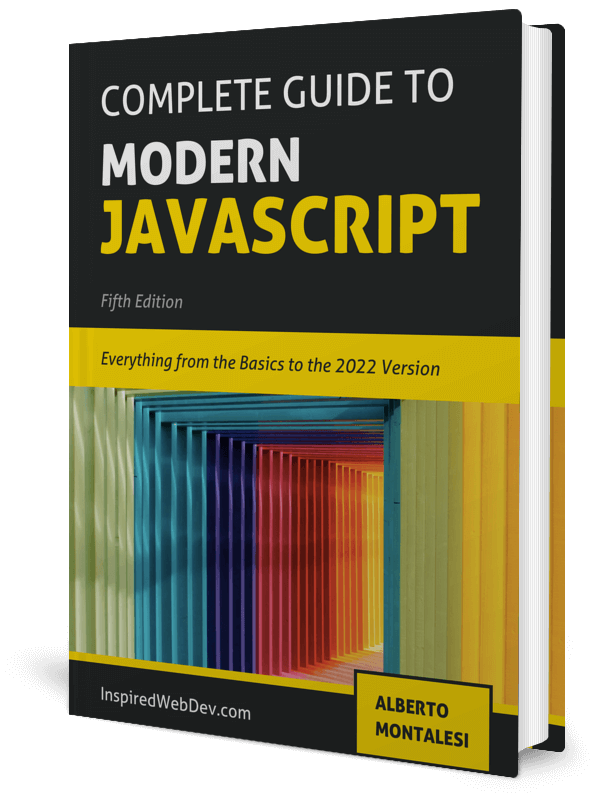
Check out my Github for my free-to-read JavaScript Ebook that covers all the new features from ES6 to 2021. If you want find a great place for interactive tutorials, i recommend Educative where you can find my JavaScript course
This website contains affiliate links.
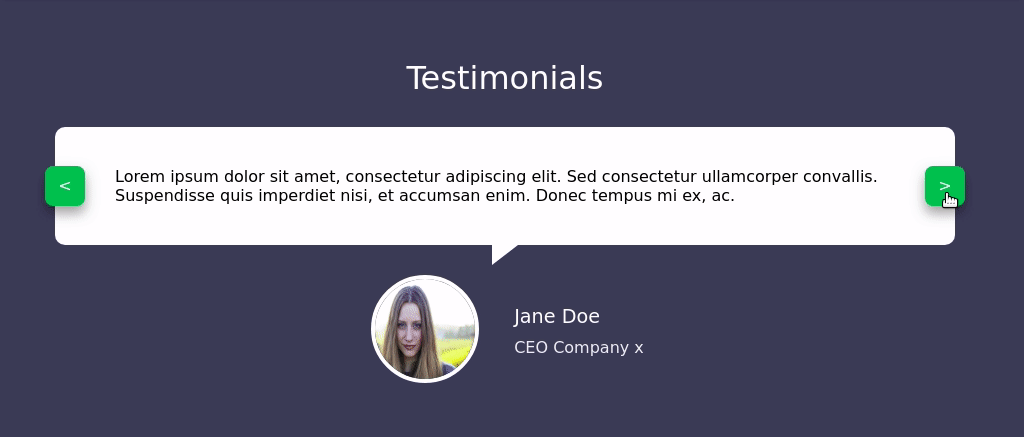
In this tutorial you will learn how to create a simple Carousel like the one below.
We will only use HTML and CSS and a bit of JavaScript.
If you want to learn more about JavaScript, check out my book, available for purchase on Leanpub
Before we start creating the structure of our carousel, go ahead and paste this code in the head of your html file:
<link
  href="https://fonts.googleapis.com/css?family=Roboto:400,700"
  rel="stylesheet"
/>
We will use Roboto as the font for our project.
For the structure of the Carousel we won’t need many elements:
containerwrapper for each slide<div class="container">
<div class="row">
<h1>Testimonials</h1>
<div id="slider">
<div class="button-left slider-button">
<span> < </span>
</div>
<div class="button-right slider-button">
<span> > </span>
</div>
<div class="slide slide1 showing">
<div class="slide-text">
Lorem ipsum dolor sit amet, consectetur adipiscing elit. Sed
consectetur ullamcorper convallis. Suspendisse quis imperdiet nisi, et
accumsan enim. Donec tempus mi ex, ac.
</div>
<div class="slide-testimonial">
<div class="slide-img">
<img alt="testimonial" src="./images/testimonial1.jpg" />
</div>
<div class="slide-person">
<p>Jane Doe</p>
<p>CEO Company x</p>
</div>
</div>
</div>
</div>
</div>
</div>
this will be the structure of our carousel As you can see I’ve only pasted the code for the first slide, go ahead and add two more, choosing a picture and a description that you like.

Let’s start styling the carousel. Paste this code to apply some basic style to the body and the wrapper for the carousel:
:root {
  /* we define some variables to hold our colors*/
  --bg-section: #374057;
  --color-headers: #2c3e50;
  --color-highlight-green: #00af4e;
  --color-light-gray: #eeeff2;
}

* {
  /* apply our google font */
  font-family: 'Roboto', sans-serif;
  padding: 0;
  margin: 0;
  text-decoration: none;
  font-size: 16px;
}

body {
  /* make the body full height */
  position: relative;
  height: 100vh;
  background-color: var(--bg-section);
  display: flex;
}

/* position our container in the middle */
.container {
  width: 900px;
  margin: auto;
  padding: 20px;
}

/* style the header */
h1 {
  font-size: 2rem;
  color: white;
  text-align: center;
}
Awesome, now it’s time to move on to the actual carousel.
/*create slider */
#slider {
  position: relative;
  height: 300px;
  padding: 0;
  margin: 0;
  margin-top: 30px;
  margin-bottom: 30px;
}

.slide {
  /* we position the slide absolutely compared to its parent #slider */
  position: absolute;
  left: 0px;
  top: 0px;
  width: 100%;
  height: 100%;
  opacity: 0;
  z-index: 1;
  /* change the value for a faster or slower transition between slides */
  -webkit-transition: opacity 0.5s;
  -o-transition: opacity 0.5s;
  transition: opacity 0.5s;
}

/* class to show the current slide */
.showing {
  opacity: 1;
  z-index: 2;
}

.slide-text {
  background-color: white;
  border-radius: 10px;
  margin: auto;
  padding: 40px;
  padding-left: 60px;
  position: relative;
}

/* create the notch */
.slide-text:after {
  content: '';
  display: block;
  position: absolute;
  bottom: -20px;
  left: calc(50%);
  -webkit-transform: translateX(-50%);
  -ms-transform: translateX(-50%);
  transform: translateX(-50%);
  width: 0;
  height: 0;
  border-style: solid;
  border-width: 20px 26px 0 0;
  border-color: white transparent transparent transparent;
}

/* align the testimonial in the center */
.slide-testimonial {
  margin-top: 20px;
  display: -webkit-box;
  display: -ms-flexbox;
  display: flex;
  -webkit-box-pack: center;
  -ms-flex-pack: center;
  justify-content: center;
  -webkit-box-align: center;
  -ms-flex-align: center;
  align-items: center;
}

.slide-img {
  margin: 10px;
}

.slide-img img {
  width: 100px;
  height: 100px;
  border-radius: 50%;
  border: 4px solid white;
}

.slide-person {
  margin-left: 20px;
}

.slide-person p {
  padding: 5px;
}

/* make the name of the person bold */
.slide-person p:first-of-type {
  color: white;
  font-weight: bold;
  font-size: 1.2rem;
}

/* make their job title light gray */
.slide-person p:last-of-type {
  color: var(--color-light-gray);
}

/* position the buttons and make them green */
.slider-button {
  cursor: pointer;
  color: white;
  font-weight: bold;
  width: 40px;
  height: 40px;
  background-color: var(--color-highlight-green);
  z-index: 3;
  position: absolute;
  text-align: center;
  border-radius: 20%;
  -webkit-box-shadow: 0 8px 16px 0 rgba(0, 0, 0, 0.2), 0 6px 20px 0 rgba(0, 0, 0, 0.19);
  box-shadow: 0 8px 16px 0 rgba(0, 0, 0, 0.2), 0 6px 20px 0 rgba(0, 0, 0, 0.19);
  display: -webkit-box;
  display: -ms-flexbox;
  display: flex;
  -webkit-box-pack: center;
  -ms-flex-pack: center;
  justify-content: center;
  -webkit-box-align: center;
  -ms-flex-align: center;
  align-items: center;
}

/*posion the left an right button horizontally */
.button-left {
  position: absolute;
  left: -10px;
}

.button-right {
  position: absolute;
  right: -10px;
}
We applied some simple styling and made use of flexbox to create the layout we wanted. If you are wondering why I repeated some styles such as:
display: -webkit-box;
display: -ms-flexbox;
display: flex;
This is called prefixing, and it is used to ensure that our css will work on every browser. You can use something like Autoprefixer to prefix your code and be sure that no matter what browser your users will use, they will experience your app/website the way you intended.
testRight now our slider is not working, we need to write some JavaScript to be able to change slide when pressing a button. Copy this code in your script.js file
document.addEventListener('DOMContentLoaded', () => {
  // grab all the slides
  let slides = document.querySelectorAll('#slider .slide')
  // set initial slide
  let currentSlide = 0
  //grab both buttons
  const nextButton = document.querySelector('.button-right')
  const prevButton = document.querySelector('.button-left')

  function nextSlide() {
    // current slide becomes hidden
    slides[currentSlide].className = 'slide'
    // set the current slide as the next one
    currentSlide = (currentSlide + 1) % slides.length
    // add the class showing to the slide to make it visible
    slides[currentSlide].className = 'slide showing'
  }

  function prevSlide() {
    // current slide becomes hidden
    slides[currentSlide].className = 'slide'
    // set the current slide as the previous one
    currentSlide = (currentSlide - 1) % slides.length

    if (currentSlide == -1) {
      currentSlide = slides.length - 1
    }
    // add the class showing to the slide to make it visible
    slides[currentSlide].className = 'slide showing'
  }

  nextButton.addEventListener('click', () => {
    // go to next slide on click of the button
    nextSlide()
  })
  prevButton.addEventListener('click', () => {
    // go to previous slide on click of the button
    prevSlide()
  })

  /* VERTICALLY ALIGN THE BUTTONS IN THE MIDDLE OF THE SLIDER TEXT
   */
  function positionSliderButton() {
    // grab the slider
    let slider = document.querySelector('.slide-text')
    // grab its height
    let sliderHeight = slider.getBoundingClientRect().height
    // grab the button
    let buttons = document.querySelectorAll('.slider-button')

    // for each of the buttons
    for (button of buttons) {
      // get their height
      let buttonHeight = button.getBoundingClientRect().height
      // position them right in the middle of the text,
      button.style.top = ((sliderHeight - buttonHeight) / 2).toString() + 'px'
    }
  }
  positionSliderButton()

  // whenever the window is resize, reposition the buttons
  window.addEventListener('resize', () => {
    positionSliderButton()
  })
})
What we are doing is very simple:
The second part of the code is used to ensure that our buttons are always positioned in the middle of the text of the slide. I wanted to do it this way to show you a cool property: button.getBoundingClientRect().height; that we used to grab the height of the button. I have used window.addEventListener('resize', () => { positionSliderButton(); }); to make sure that whenever a user resizes the page, the button will move to stay in the correct position